I’ll walk you through three cleaning jobs: changing colors, finishing a session, and removing stubborn residue. Start with the section that matches what is in your airbrush. The basic approach is to clear out paint before it dries, clean the parts it touches and check the spray afterward.
The needle steps below assume a rear-removable needle. Where nozzle fittings or a cleaning product require a particular procedure, I’ll identify that example separately. Match liquids to your paint and equipment rather than treating one brand’s soaking time as a rule for every airbrush.
Scroll sideways to see all columns
| Situation | Cleaning needed | Parts to remove |
|---|---|---|
| Changing colors | Wipe the cup and flush out the old color | Usually none |
| Finishing a session | Flush, then clean the needle | Handle and needle for the routine shown below |
| Dried paint or persistent uneven spray | Clean the affected front parts and paint passage | Depends on the nozzle design |
What You Need to Clean an Airbrush
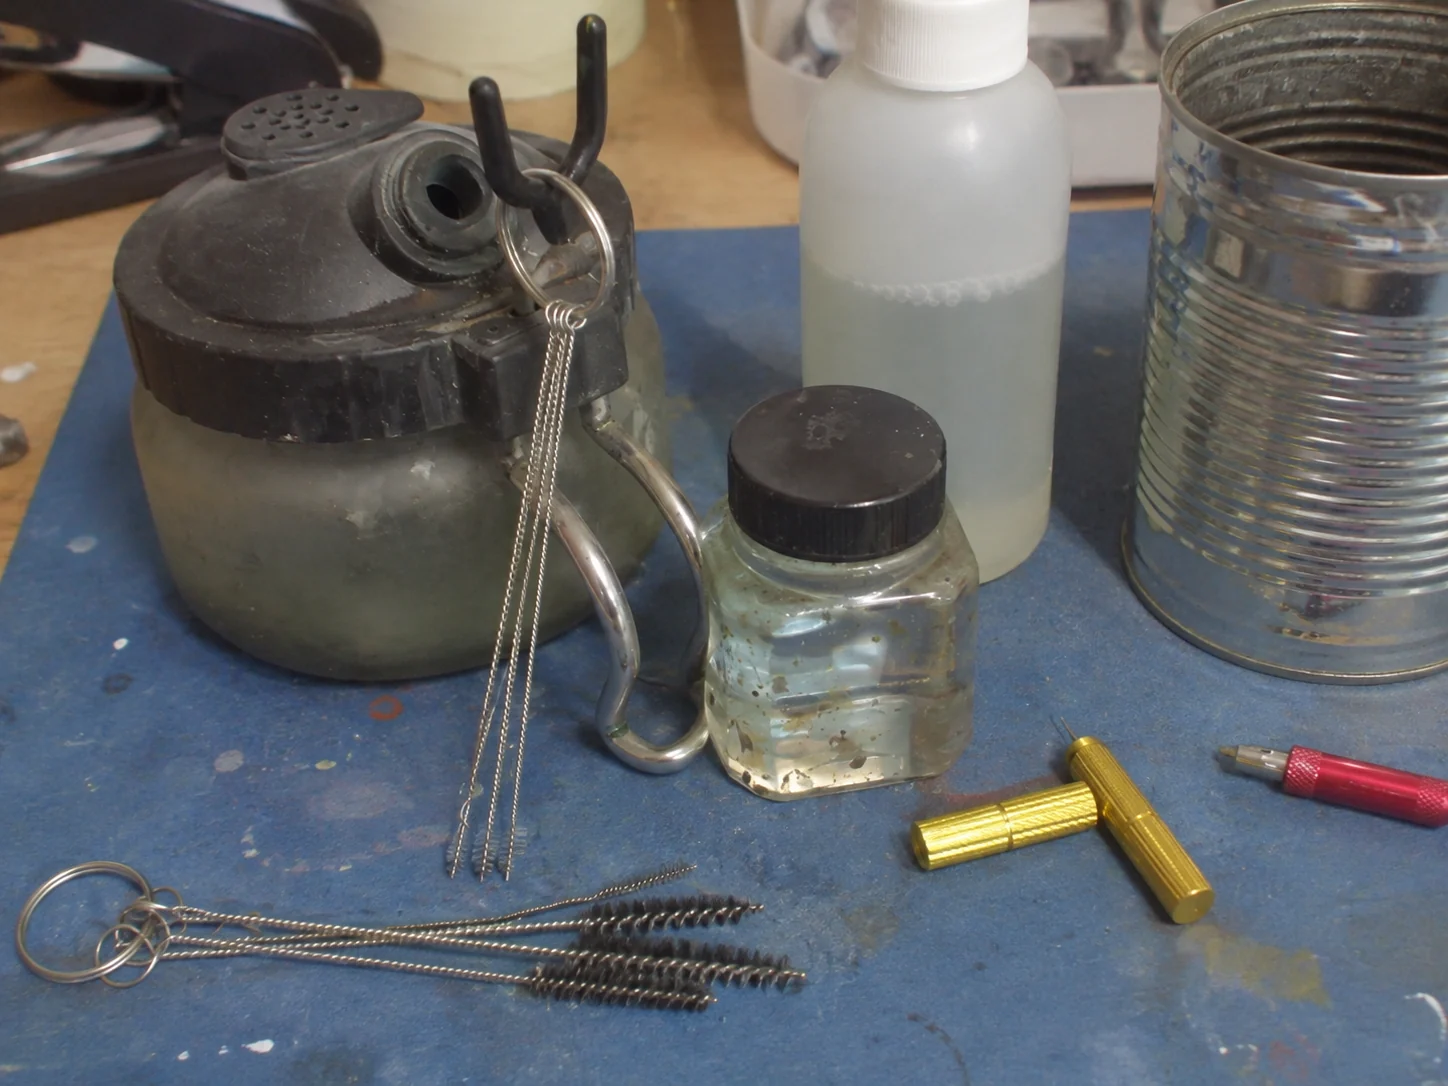
Set out a few tools before you start:
- Water and a suitable airbrush cleaner. Choose the cleaner for the paint you sprayed, not just the brand of airbrush.
- A soft cup brush. Use it on the cup walls and around the outlet.
- A lint-free cloth. For the needle and accessible surfaces.
- Small cleaning brushes or non-shedding pipe cleaners. For accessible passages and caps, where the tool fits without force.
- A spray-out pot and waste container. Collect leftover paint rather than spraying it all into the room. A cleaning pot does not replace ventilation.
- The correct nozzle tool and a tray. Keep small parts away from an open drain.
Choosing a Cleaning Liquid
Fresh residue and dried buildup need different treatment. Start with the simplest suitable option, then move to a dedicated cleaner if residue remains.
Scroll sideways to see all columns
| Paint or residue | Cleaning option | What to know |
|---|---|---|
| Fresh water-based acrylic | Water for the initial rinse | If color or deposits remain, continue with an appropriate cleaner |
| Water-soluble paint residue | Medea Airbrush Cleaner | For flushing and cleaning parts that touch paint; use with a compatible paint system |
| Vallejo paint residue | Vallejo Airbrush Cleaner, 71.099 and 71.199 | A dedicated cleaner for removing color residue; use the directions on your bottle for dilution |
| Stubborn paint stains on an airbrush or metal mixing tools | Tamiya Airbrush Cleaner 87089 | For stubborn paint stains; check compatibility before exposing seals, finishes or plastic parts |
| Vallejo Liquid Metal residue (alcohol-based range) | Isopropyl alcohol | Vallejo specifies IPA for cleanup; this does not apply to Model Color or Model Air |
| Dried residue on removable Iwata nozzle parts | Medea Airbrush Cleaner | Iwata specifies a soak of no more than 10 minutes for the listed front parts |
Keep soaking limits specific to the product and parts named in the procedure. Never soak an assembled airbrush. If the cleaner and equipment instructions conflict, choose a method approved for both.
Airbrush Cleaner vs. Thinner
Thinner goes into the paint to help it spray. Cleaner removes paint residue from the cup and paint passage. I use the paint’s thinner for flushing only when the paint maker also specifies it for cleanup and it is compatible with the airbrush.
For example, Vallejo specifies isopropyl alcohol for both thinning and cleanup after its alcohol-based Liquid Metal range. For fresh water-based acrylic that cleans up with water, I start with water and switch to a compatible cleaner if residue remains.
Keep dedicated cleaner out of the paint mix unless its label also identifies it as a thinner for that paint.
For paint preparation, thinner and flow improver do different jobs. Neither should be confused with the cleaner used here.
Do You Need an Airbrush Cleaning Kit?
A kit bundles tools you can also buy separately. For routine cleaning, a soft cup brush, lint-free cloth and somewhere to collect waste are the starting point. Add passage brushes and a nozzle tool when the job and your airbrush’s design call for them. You do not need to use every tool in a kit at every clean.
Choose tools by where they will be used. A soft brush for the cup is different from a small passage brush, and neither should be forced through the nozzle opening.
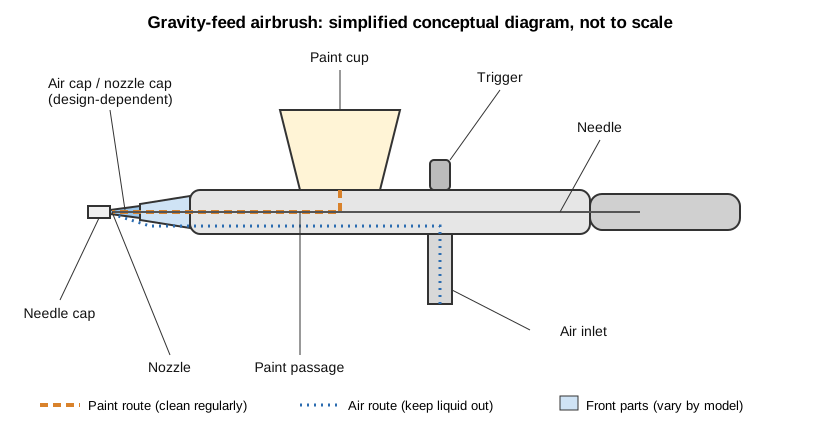
The diagram shows the basic layout, not a disassembly sequence. Paint travels from the cup through the paint passage to the nozzle. The needle controls paint flow; air reaches the front through a separate route. Focus routine cleaning on the parts that contact paint.
How to Clean an Airbrush Between Colors
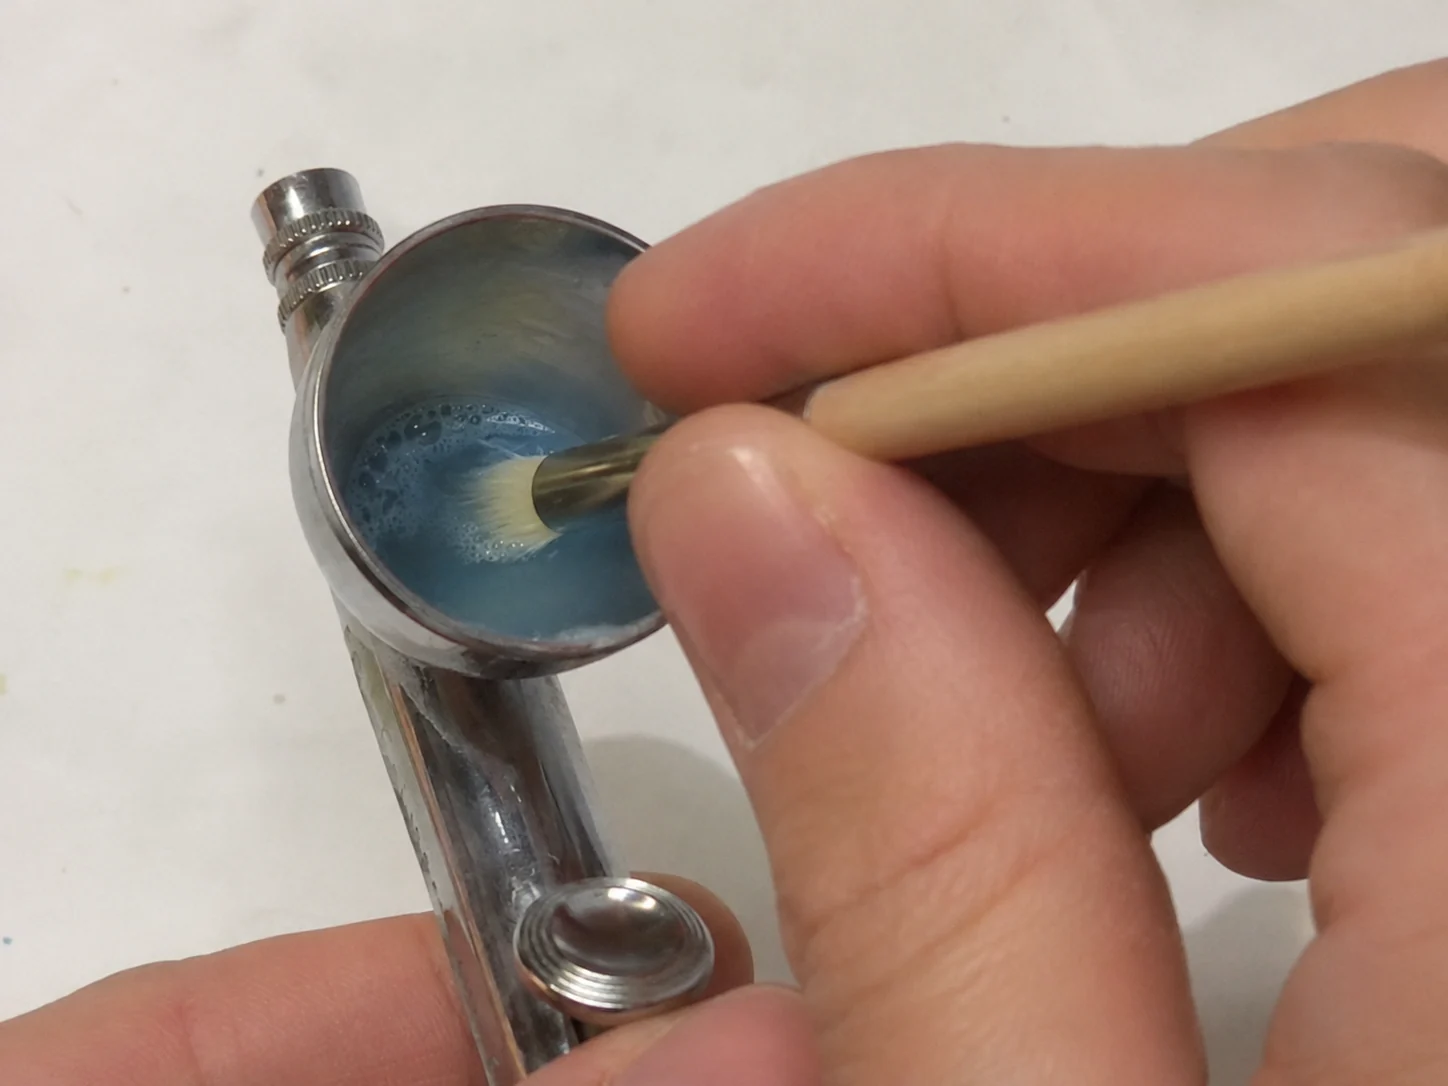
There is no need to dismantle the front end for an ordinary color change.
- Empty the remaining paint into your waste container.
- Wipe the cup, including the area around its outlet, with a soft brush and water or suitable cleaner.
- Add fresh rinsing liquid and spray it into a cleaning pot.
- Repeat until a small test spray on white paper shows no trace of the old color.
Take extra care when moving from dark to light colors or between contrasting colors such as violet and yellow. Highly pigmented paint, including white, may take several rinses. Test the next color on scrap before returning to your model.
How to Clean an Airbrush After Painting
End-of-session care adds a needle clean to the color-change flush. This removes residue that could otherwise dry on the needle between sessions.
First, with the air connected:
- Empty and wipe the cup.
- Flush until the spray runs clear. If the cleaner requires a follow-up rinse, complete it with the specified liquid.
- Wipe accessible paint from the cup lip and exterior surfaces.
Then disconnect the air. For a needle removed through the back of the body:
- Unscrew the back handle and loosen the needle chucking nut by hand.
- Draw the needle straight out toward the rear. Keep its point clear of the work surface.
- Wipe it with a small amount of cleaner on a lint-free cloth, moving from the back toward the point. Rotate it to clean all sides.
- With the trigger depressed, gently slide the needle back until it seats. Do not push beyond that stop.
- Tighten the chucking nut by hand and replace the handle.
This is routine needle care, not a complete teardown. Finish with the spray test, then leave the cup empty for storage.
How to Take Apart and Deep Clean an Airbrush
A deeper clean is useful when flushing leaves recurring color contamination, visible deposits or a spray pattern that remains uneven. It can also prevent buildup in places a quick rinse does not reach.
Before You Disassemble Your Airbrush
Disconnect the air and work over a tray. Identify the nozzle type in your model’s parts diagram before removing it. The two examples below use different fittings and tools.
You do not need to dismantle the air valve, trigger mechanism or needle seal for this routine. If paint has reached those areas, treat that as a separate servicing problem.
How to Clean the Needle
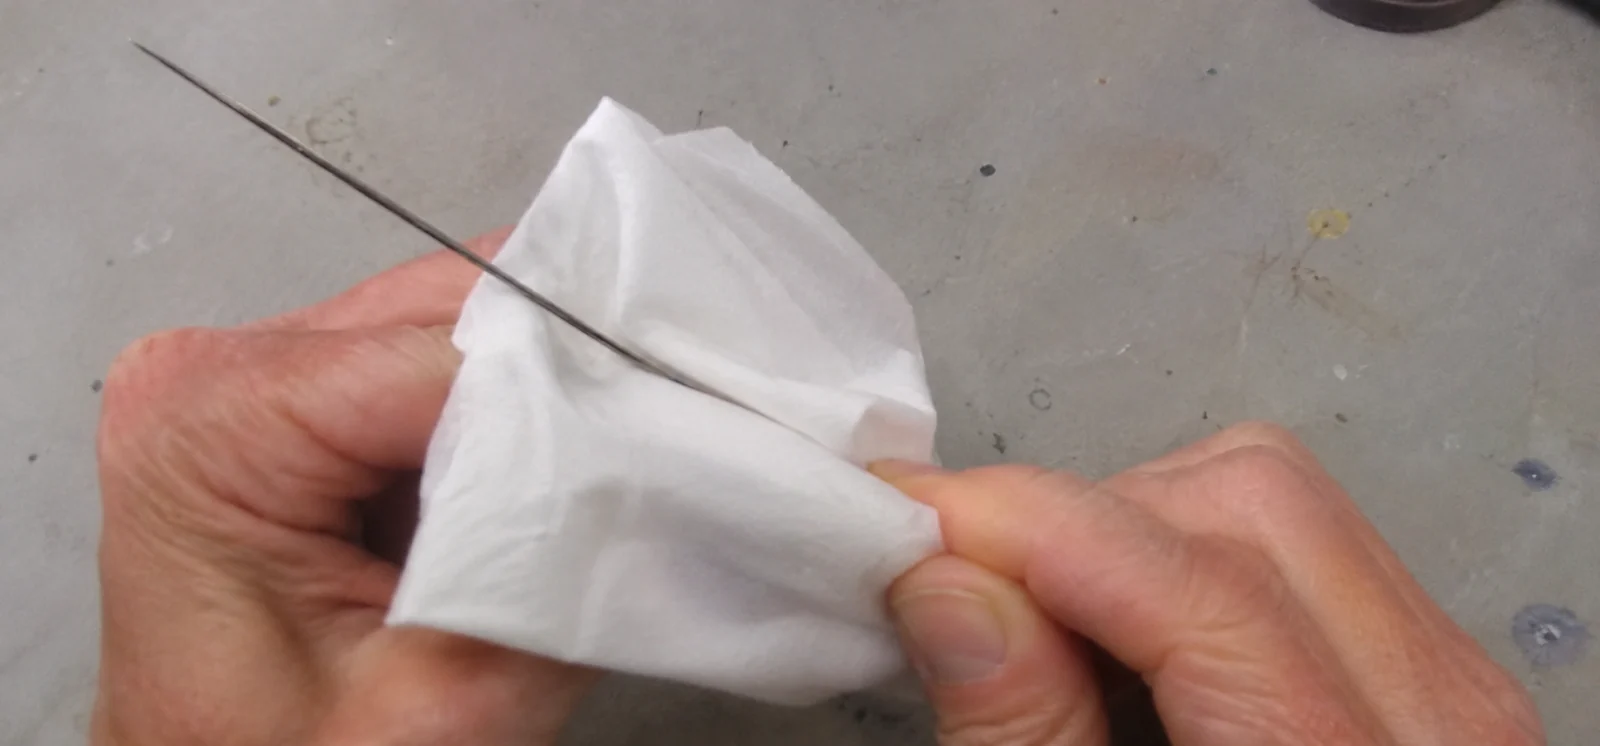
Use the needle-cleaning steps above. Once the residue is gone, inspect the point under good light. A hooked or bent point can affect the spray even when the needle is clean. Cleaning will not restore a damaged tip; set it aside for assessment or replacement rather than attempting to straighten it here.
Keep the cleaned needle somewhere it cannot roll or fall while you work on the front end.
How to Clean the Nozzle and Caps
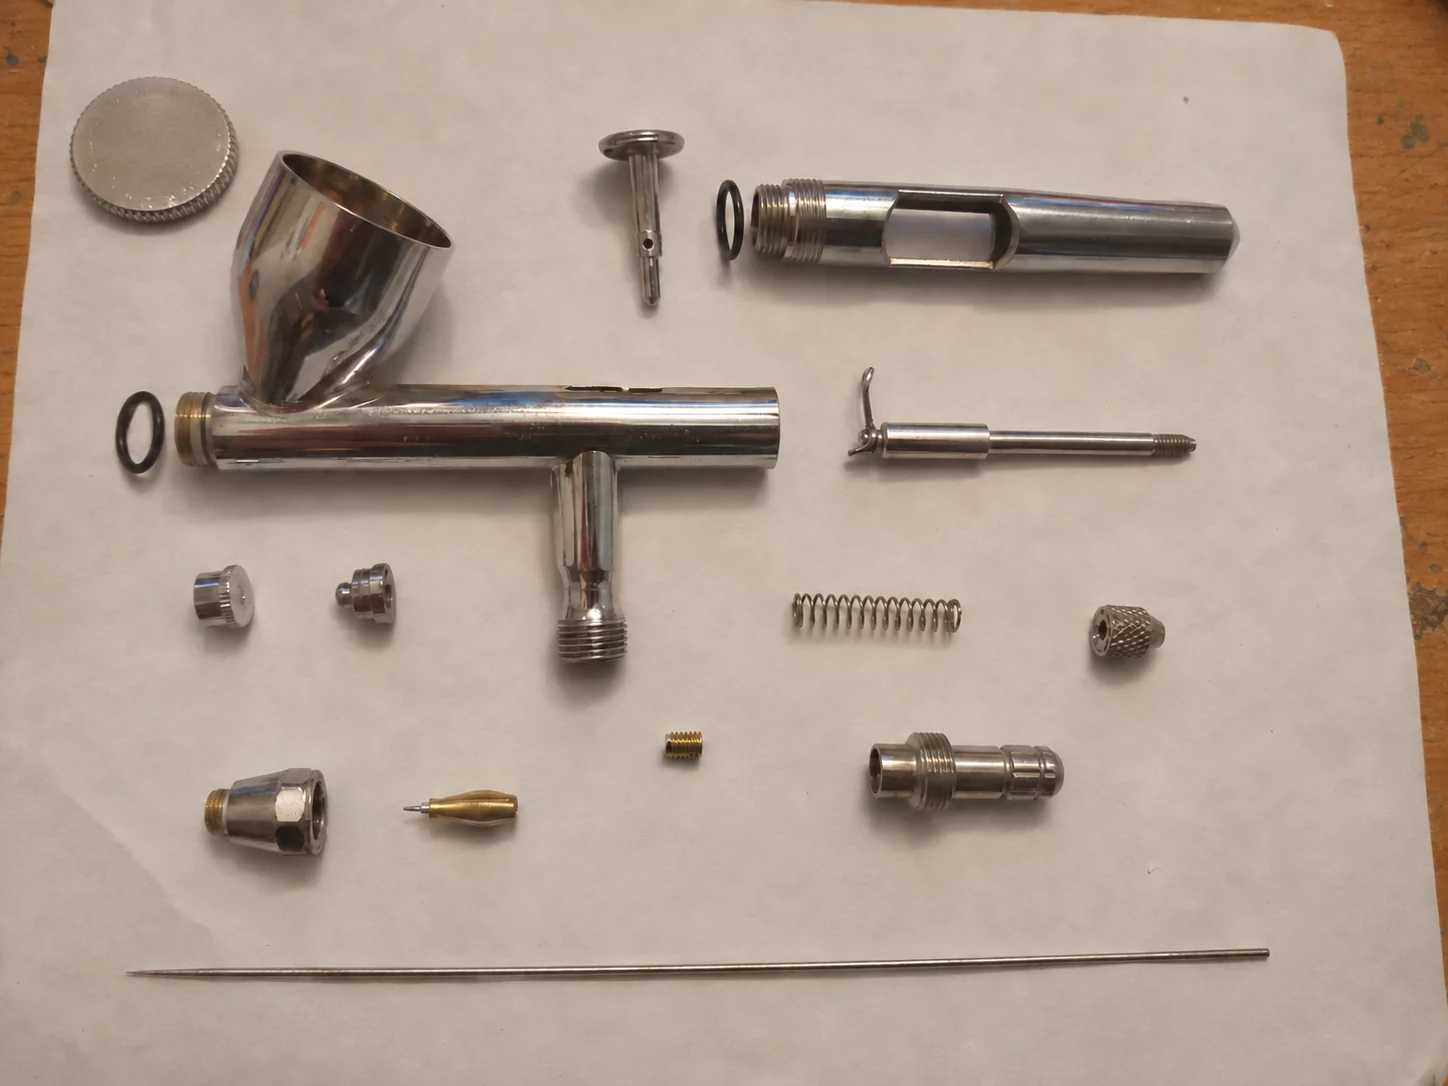
The needle cap protects the needle point. The nozzle is the small paint outlet around it. Other front caps direct airflow or hold parts in place. Their names and arrangement depend on the model.
For a threaded Iwata nozzle: remove the front caps as specified, fit the correct nozzle wrench over the flat sides of the nozzle base and turn counterclockwise. The wrench must match the nozzle, not merely fit somewhere on the head.
For Iwata Eclipse BS, SBS and CS compression-fit nozzles: remove the front caps and use the supplied head-cap wrench for the nozzle head cap. The nozzle itself is not unscrewed. Keep the nozzle set together and do not apply the threaded-nozzle wrench to it.
In Iwata’s illustrated cleaning guide, the removed nozzle, needle cap, nozzle cap and applicable nozzle head cap are soaked in Medea Airbrush Cleaner for no more than 10 minutes. An extra-small brush is then used to remove softened residue.
Use gentle strokes with a suitably sized brush. Do not force a pin or rigid tool through the fine outlet. Inspect the nozzle for remaining deposits, cracks or distortion before refitting it.
How to Clean the Paint Passage
With the needle and nozzle removed, check which parts of the paint passage are accessible. If the cup outlet leads into a passage that accepts a brush, dip a suitably sized brush in cleaner and work gently toward the front. Move it back and forth, rotating it, until it no longer picks up paint. Clean from the front opening too, where the design allows access.
The brush should enter without being forced. An oversized brush is not a better cleaning tool. Wipe accessible exterior residue separately rather than allowing cleaner to run toward the trigger and air valve.
Reassembly and a Final Spray Test
Refit the nozzle and caps using the tools and assembly sequence for your nozzle type. Some caps tighten by hand; other head components need their matching wrench. Use thread sealer only at joints where your model’s assembly instructions require it, and keep it out of the paint and air passages.
Reinsert the needle gently, secure the chucking nut and replace the handle. Reconnect the air and add water for this water-based-acrylic cleaning routine.
On a double-action airbrush:
- Pressing the trigger down should release air only.
- Pulling it back should produce an even water spray.
- Water should not leak from the front or bubble back into the cup during normal spraying.
If water sprays when you press down without pulling back, disconnect the air and check the needle seating and assembly. Do not force the needle forward. Persistent leakage or an uneven pattern after cleaning needs further diagnosis, not repeated tightening.
If the spray still fails, check the paint path and needle movement before taking the airbrush apart again.
How to Clean an Airbrush With Dried Paint
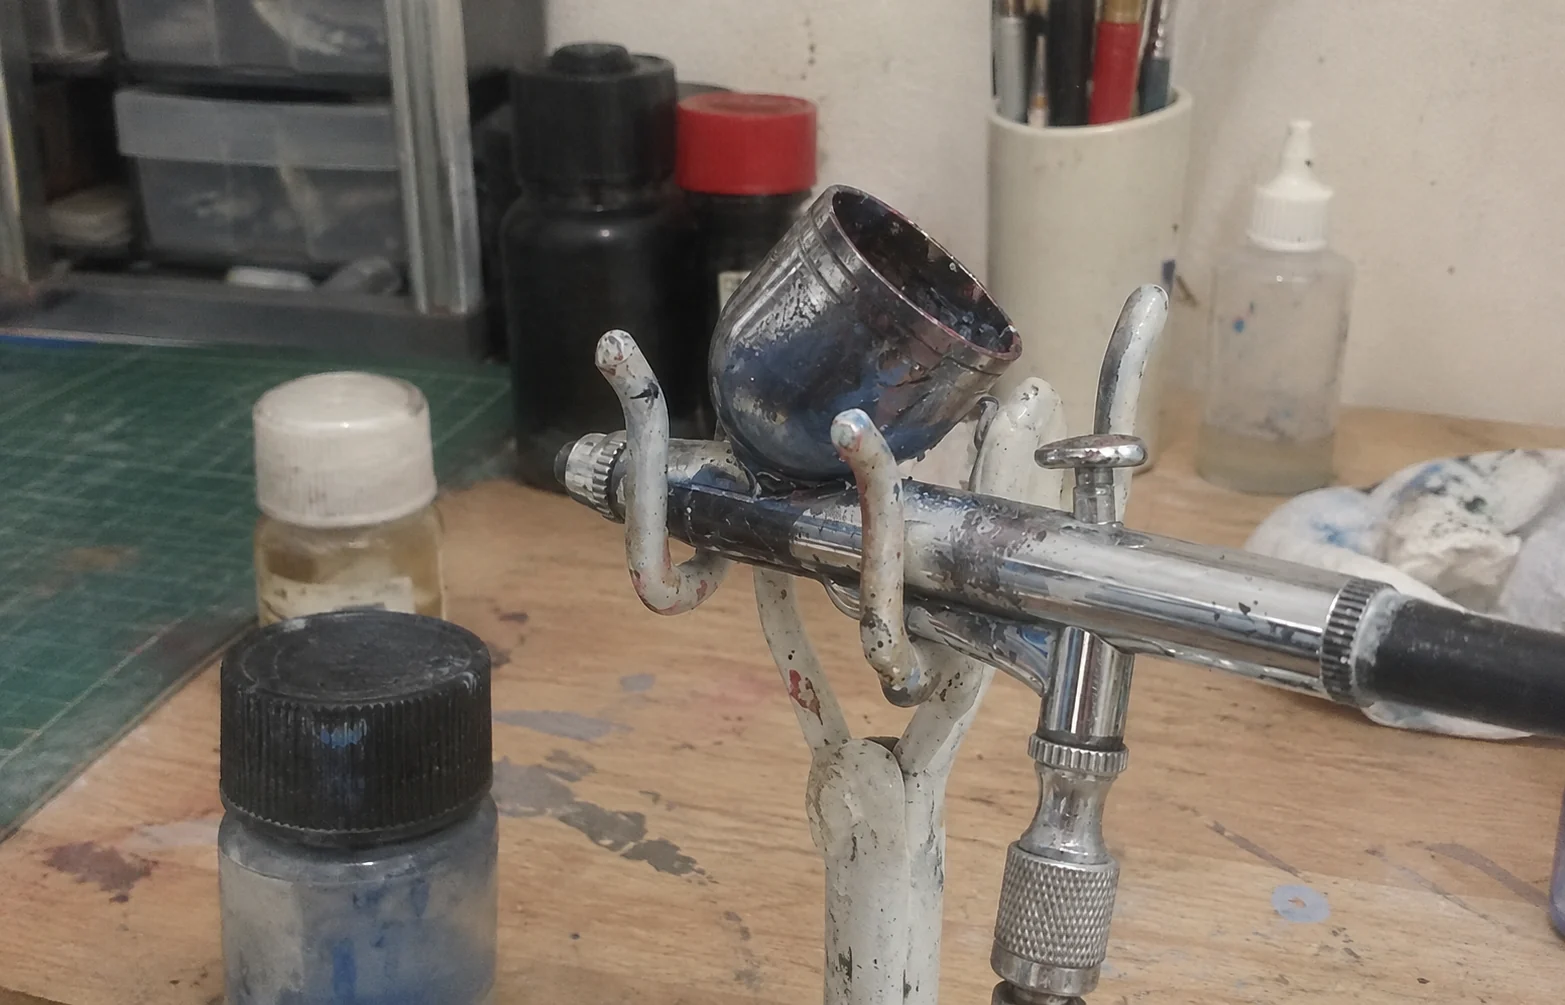
For acrylic dried around the cup outlet or inside the front end, soften the residue before brushing it away.
For removable Iwata front parts with Medea Airbrush Cleaner:
- Disconnect the air and empty the cup. Remove the back handle, loosen the chucking nut and withdraw the needle only if it moves freely. If it is stuck, stop rather than pulling it out with pliers.
- Remove the front parts. Take off the needle cap and nozzle cap. For a threaded nozzle, use the matching nozzle wrench. For an Eclipse BS, SBS or CS, remove the head cap with its supplied wrench and keep the compression-fit nozzle set together.
- Soak the removed nozzle and caps for no more than 10 minutes. Include the nozzle head cap where applicable. Use Medea Airbrush Cleaner, not an unspecified solvent, and keep the assembled body out of the bath.
- Brush away the softened residue. Use a suitably sized soft brush on the detached parts. Wipe the needle separately toward the point and clean the accessible paint passage until the brush no longer picks up paint.
- Reassemble and test. Refit the nozzle, caps and needle, reconnect the air and test with water. On a double-action model, pressing down should give air only; pulling back should give an even spray without leakage or cup bubbles.
The Iwata cleaning instructions set the 10-minute limit for those detached parts. It is not a soaking time for a complete airbrush or a different cleaner. If residue remains, do not simply extend the soak beyond that limit. A stuck fitting, damaged nozzle or needle that will not move needs separate diagnosis.
Some dried-paint removers are meant only for soaking or wiping parts. Do not spray one through the assembled airbrush unless its directions specifically allow that use.
How to Clean an Airbrush Without Cleaner
For fresh, water-compatible acrylic, start with water while the paint is still wet:
- Empty the cup into a waste container.
- Wet a soft brush with clean water and loosen paint from the cup walls and outlet.
- Add fresh water, spray into a cleaning pot and repeat until a test spray on white paper shows no old color.
- At the end of the session, disconnect the air and inspect the needle. Wipe away wet residue with a water-dampened lint-free cloth, then reassemble and test.
This works best before the paint dries. If a crust remains at the outlet or on the needle, or old color keeps returning after rinsing, water has not finished the job. Use a cleaner for that paint rather than scrubbing harder.
An alternative depends on the paint, too. Vallejo Liquid Metal is a specific exception: its alcohol-based colors call for isopropyl alcohol for cleanup, as explained below. That recommendation does not apply to ordinary water-based Model Color or Model Air.
Window cleaner, nail-polish remover and homemade mixtures are not automatic substitutes. Removing paint is only half the job: the liquid also needs to suit the airbrush’s seals, finishes and other exposed parts.
Can You Clean an Airbrush With Isopropyl Alcohol?
Yes for some paint systems, but not as a universal acrylic cleaner. Vallejo provides a clear example in its Model Color brochure, under Liquid Metal. Liquid Metal is an isopropyl-alcohol-based metallic range, and Vallejo recommends only isopropyl alcohol for thinning it and cleaning brushes or an airbrush after use.
Check the range on the bottle first. Liquid Metal is different from Vallejo’s water-based Model Color and Model Air paints. A cleanup instruction for one range does not establish that IPA is the right choice for another.
Vallejo does not specify a 70%, 91% or 99% concentration or a soaking time in that recommendation. Check the product’s current directions and your airbrush’s solvent compatibility before choosing an alcohol product.
For the water-based acrylic routine in this article, use water for fresh residue and a suitable airbrush cleaner for buildup. Do not replace that routine with an unverified IPA soak. Alcohol is flammable, so keep it away from ignition sources and use appropriate ventilation.
Cleaning an Airbrush Used for Nail Art
Choose the cleaning method for the material actually sprayed. Airbrush nail paints, gels and conventional nail polish are not interchangeable products, so do not select acetone simply because it removes a nail coating.
Use the nail-paint product’s cleanup instructions to choose a suitable liquid, then apply the relevant cup, needle and passage-cleaning steps. Removing paint is also different from disinfecting equipment used around clients. The procedures here address paint residue; hygiene requirements are a separate task.
Common Airbrush Cleaning Mistakes
Scroll sideways to see all columns
| Mistake | Why it causes trouble | Better approach |
|---|---|---|
| Fully dismantling the front after every color | Adds unnecessary handling of delicate parts | Flush between colors; reserve deeper work for buildup or servicing |
| Forcing an oversized tool through the nozzle | Can damage the fine outlet | Use a suitable brush and soften residue first |
| Soaking the assembled airbrush | Exposes areas beyond the paint route to liquid | Treat only compatible detached parts |
| Applying one cleaner’s soaking time to another | Chemistry and material limits differ | Use the conditions for that cleaner and those parts |
| Tightening harder to fix a poor spray | Can damage threads or the nozzle | Check cleanliness, seating and part condition |
Frequently Asked Questions
Do I need to disassemble my airbrush every time? No. A color change normally needs a flush. End-of-session care can include removing and wiping the needle where the design allows it. Nozzle removal and passage brushing are a separate, deeper level of cleaning.
Can I clean an airbrush with water? Start with water for fresh paint that cleans up with water. If deposits remain or old color returns, use an appropriate cleaner. Water is not the default cleanup liquid for every product called acrylic.
Should I backflush my airbrush? Backflushing sends air backward into the cup to agitate its contents. It is not required by the forward-flushing routine above. Check whether your model permits it before adding it, and never force a blockage by increasing pressure.
How do I know when the airbrush is clean? The rinse is clear, the cup, needle and cleaned front parts have no visible residue, and the final spray test is even. A clear-looking cup alone is not enough.
What should I do if it still will not spray? Check the air connection, paint supply, needle movement and front-end assembly. If those are correct, investigate the symptom rather than automatically repeating the whole clean. Persistent bubbling, leakage or suspected damage calls for further diagnosis.